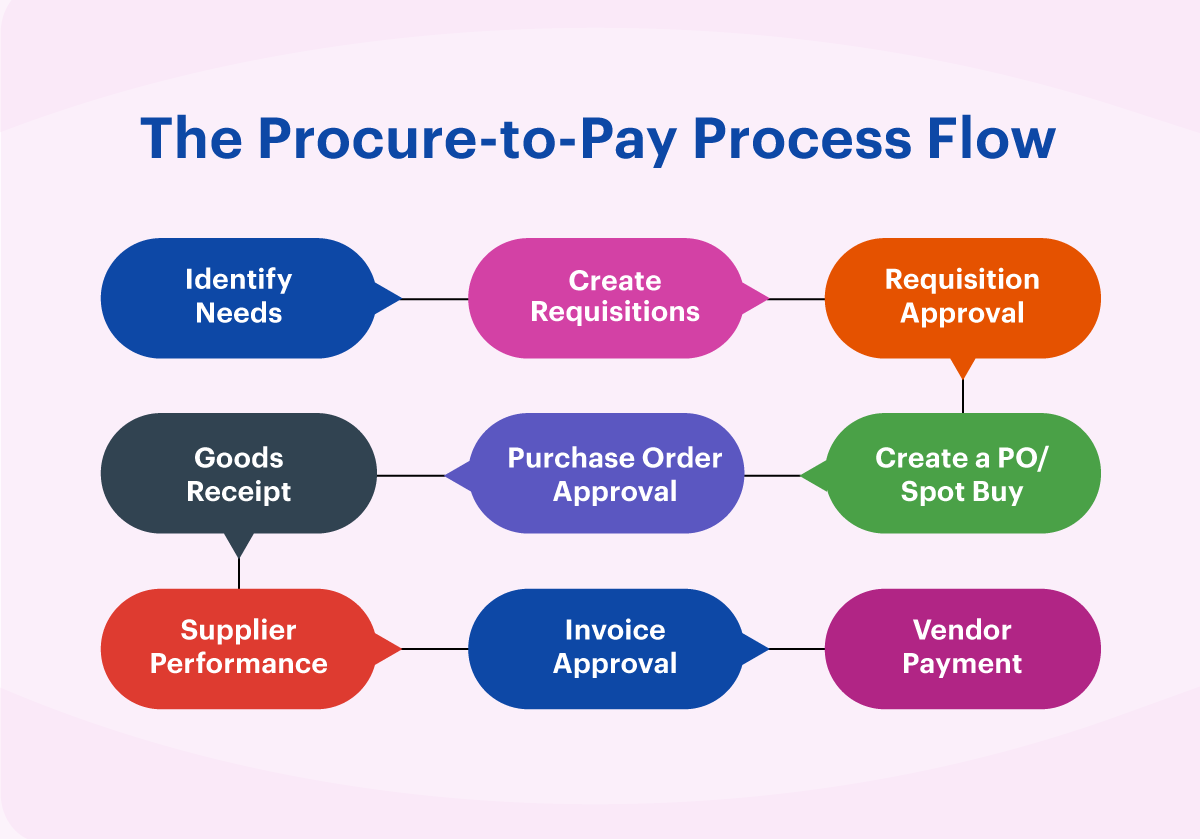
Based on organizational practice and the requirement in question, procurement leaders choose to complete the most relevant stages of a procure-to-pay process. Here are nine logical steps of an ideal procure-to-pay process.
 Logical steps of an ideal procure-to-pay process.
This post explains the Procure-To-Pay process in layman’s terms.
Lets take the following scenario – A person wants to buy a car.
The tasks associated with this can be listed out as below :
1. Identify the car
2. Identify the vendor
3. Check for discounts available
4. Place the order
5. Receive the car
6. Make payment
The above are the major tasks that the person would have to do for getting the product at his place of choice. So, for understanding’s perspective, tasks 1 through 5 are grouped under Procurement or Purchasing while task 6 is a part of Payment or Payables.
Extending the understanding to an organizations’s perspective, we have the following :
Requester - The person who raises the request for an item. This could be anyone within the organization, authorized to raise purchasing requests.
Buyer – Generally a person from the Purchasing department. This person is tasked with collating all the items requested by various Requestors and placing purchasing orders to the vendors.
Vendor / Supplier – The person or an organization tasked with supplying the requested item.
Receiver – A person who receives the requested item.
Invoice – A document provided by the vendor to the buying organization having details of the item like item description, quantity, amount, tax and total amount payable.
So, going back to our earlier scenario :
Requestor is the person looking to buy a car. Buyer is the person who will identify the vendor, check for discounts and place the order. Vendor (or supplier or dealer in this example) will ship the car that will be received by the Receiver. Vendor will also send an invoice that will be paid by the buying organization.
This is how a typical Procure-To-Pay process works in an organization. Of course, in reality it is not so simple and has other functionalities / processes within each of the major tasks that we just saw.
A more detailed examination of this P2P process will be discussed in my subsequent posts. That will focus more on PeopleSoft terminologies and processes.
PeopleSoft Procure to Pay links Purchasing and Payables modules to provide control and visibility over the entire life-cycle of a transaction – right from the way an item is ordered to the way that the final invoice is processed.
If you are starting out as a Procure to Pay consultant, this list of tables will be a quick reference for you. The main application tables used in the Procure to Pay cycle are listed here.
Master data tables
| Module | Table Name | Description |
|---|---|---|
| AP | VENDOR | Vendor Header |
| PO, IN | ITEM | Items |
| GL | GL_ACCOUNT_TBL | Accounts |
| GL | DEPT_TBL | Departments |
| GL | PRODUCT_TBL | Products |
| GL | PROJECT_FS | Projects |
| GL | OPER_UNIT_TBL | Operating Units |
| PO | MASTER_ITEM_TBL | Item Master Header |
| PO, IN | INV_ITEMS | Inventory Item master |
| IN | STOR_LOC_INV | Storage Location Definition |
Transaction tables
| Module | Table Name | Description |
|---|---|---|
| AP | VOUCHER | AP Voucher Header |
| AP | DISTRIB_LINE | Voucher Distribution Lines |
| AP | PAYMENT_TBL | AP Disbursements |
| AP | PYMNT_ADVICE | AP payment Advice Information |
| AP | VENDOR | Vendor Header |
| AP | BUS_UNIT_TBL_AP | AP Business Unit table |
| AM | ASSET | Asset general Information |
| AM | ASSET_ACQ_DET | Asset Acquisition Detail |
| AM | DEPRECIATION | Depreciation transactions |
| AM | COST | Asset Cost Transactions |
| PO | REQ_HDR | Requisition header |
| PO | REQ_LN | Requisition line |
| PO | PO_HDR | Purchase order header |
| PO | PO_LINE | Purchase order line |
| AR | ITEM | Customer Items |
| GL | JRNL_HEADER | Journal Headers |
| GL | JRNL_LN | Journal Line Data |
| IN | CM_ONHAND_VW | On hand quantity |
| IN | CM_INTRANSIT | Inventory in transit |
| IN | TRANSACTION_INV | Inventory Transactions |
| IN | IN_DEMAND | Order Request |
| IN | PHYSICAL_INV | Physical Inventory |
Accounting tables
| Module | Table Name | Description |
|---|---|---|
| AP | VCHR_ACCTG_LINE | AP Accounting entries |
| AM | DIST_LN | AM Accounting entries |
| GL | LEDGER | Ledger Data |
| AR | ITEM_DST | AR Accounting entries |
| PO | PO_LINE_DISTRIB | POline accounting entries |
| IN | CM_ACCTG_LINE | INV Accounting Distribution |


